Pages

Monday, May 21, 2012

Design Wall Monday – May 21, 2012

This will be a quickie post because I am off in one hour to the Red Rooster!!!  Yippee!!!  Wanna come along?  =^..^=


My design wall has a new quilt on it this week – Yay!!!  As promised, Vintage Valentine is next on my 2012 UFO Challenge list.  The pattern is a Verna Mosquera design from The Vintage Spool.  It has 12 sweet blocks surrounding a simply gorgeous medallion block! This is a very romantic quilt crafted of bows and birdies and above all Hearts, Hearts, and more Hearts!!!  Romantic may not be my usual style, but hearts definitely are! 


Here is what I have done so far…

Block #1

Block #2
Blocks 1 and 2 are complete.  All pieces fused down and stitched.

Block #3
Block #4
Blocks 3 and 4 have the pieces fused down but still need to be buttonhole stitched down.


I have all the pieces drawn on fusible and ready to go, so the drudgery part of the process is done :*)

I had originally planned to work on this at retreat, but then I decided against it because I didn’t want to have to carry all the fabrics I am using along with me.  I want to keep this retreat simple, so I decided to take two very straightforward projects that fit into one project box and simply require nothing but straight stitching.  No appliqué or other special stitching means I can take my little Featherweight instead of my heavy, bulky Janome 6600P too.  I’m travelin’ light folks!!!  More room for fabric to bring home ….. oops, no fabric shops between here and there anymore :(  Oh well!  I guess this means I won’t need to carry a lot of money either :*)  And maybe a positive Stash Report this week too?  Dare I hope????

Please pray for traveling angels for us.  It is a 3-hour trip but we are buddying up, so there should be no problems staying alert & awake :*)

That’s it for my design wall this week – what’s on yours?  Go to Patchwork Times to see what others are working on!

Hugs & Blessings!
Teresa
=^..^=

Sunday, May 20, 2012

Bloggers’ Quilt Festival

There is an amazing event going on in the Blogosphere right now – the Bloggers’ Quilt Festival hosted by Amy’s Creative Side!  Seriously, you need to go over there and check out all the amazing quilts being entered!!!  I’m just stunned at them all =^..^=

Now, you know me, and you know I have to join in, right?  So here’s my entry….


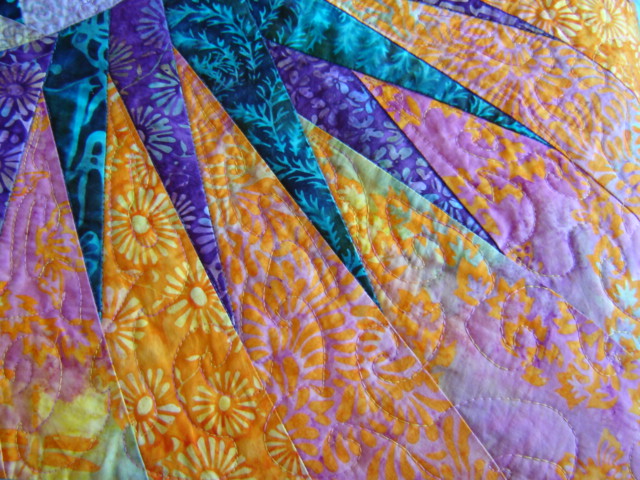
Easter Sonrise is a Judy Niemeyer design called Hawaiian Star that I first saw in a magazine back in 2007.  Let me just say I was stunned the first time I saw it and thought to myself, “If I could ever make a quilt like that, I will be a *real* quilter!”  I was a fairly new quilter, still in my first year and not quite yet dry behind the ears :*D  But I had taken a paper-piecing class and loved it, so I jumped at the chance to take this 3-day class with Judy herself at Quilter’s Attic when she came to town. 

I got my first clue about what I had gotten myself into when I went to pick up my kit at the shop and saw that it required 22 yards of fabric and the pattern was in a BOX!!!  A THICK box!!!  Uh-oh!!!  Then I got my second clue when I began to cut out the pieces to prepare for class.  It took me THREE DAYS to cut out the pieces!!!  By this time, I was pretty concerned that I was in way over my head, but I packed up my stuff and headed into class, hoping that somehow I would be able to keep up.

Well, Judy was a perfect teacher!  First thing, she amazed us with a magic trick.  One of the girls had not had time to cut her fabrics before class.  Well, Super Judy took her fabrics and layered about 20 of them on top of each other and sliced and diced until she had cut out that entire quilt in about 15 minutes!!!  Yes, the same quilt that had taken me 3 days!!!  Yep, we were totally enthralled with her!  We knew we were in the presence of a *real* quilter =^..^=
Judy 'n me!
She explained everything so simply that before I knew it I was cranking out these marvelous lone star points and curved flying geese, just like everyone else :*)  She kept saying, “Now, just have fun.  Remember, there’s no mistake you can make that I can’t fix, so go for it!”  Dummy me, I believed her LOL!!! 

When we got to the part where we were making the curved flying geese, I got my first one done and took it to her to make sure I was doing it right.  She took it, looked at it for a minute, and said, “Oh no, you’ve ruined it!”  At first, I thought she was kidding, because hadn’t she said she could fix anything?  But no, she was totally serious.  I had cut off the seam allowance from the inner curve!!!  Yikes!!!  


After a minute though, she smiled and said, “Listen, don’t worry about it for now.  Go work on the others and we’ll come back to this one.”  So I did, making VERY sure that I didn’t cut off any more seam allowances :*)

The next morning I came in to class, and what did I find?  Judy presented me with a new curved flying geese unit that she had sewn up for me herself the evening before!  Was that sweet or what???  Yep, I loved her! =^..^=

It took me several months to complete the quilt top.  I held my breath with every Y seam.   But it came together beautifully .... and then it sat on a shelf in my quilting closet for another year while I practiced my quilting skills.  I didn’t want to ruin all that hard work with slipshod quilting!  And I really didn’t want to send it off for someone else to quilt it.  I wanted to say I had done this quilt – all of it!


This was the first large quilt I ever quilted on my domestic machine, a Janome 6600P.  Here are some of the pictures of the quilting.  


I’ve learned a lot since 2009 when I quilted it, but I’m still happy with how it turned out and wouldn’t change a thing.  The quilt has earned the Overall Color & Design Award and 1st Place Blue Ribbon in it’s class at the Tennessee State Fair, as well as 2 other Blue ribbons in other quilt shows.

I have such happy memories associated with this quilt!  We became a little group of Judy fans at Quilters Attic and for a while we met there to work together on our quilts.  Fun times! 

The original quilt kit called for alternating star points of green and orange.  But I really didn’t like the green.  I thought the orange points looked like a radiant burst of light, much like what must have burst forth when Jesus rose from the dead (hence the name!).  When I said that I would have preferred all my points to be orange, Pat (the first lady on the left in the front on this picture) said she rather liked the green ones and would trade with me if I liked.  I liked!!!  Pat has since passed away.  She was a wonderful quilter and a really lovely person, and I wouldn’t take anything for having gotten to know her and all of these other amazing ladies through this class.

I hope you’ve enjoyed this walk down memory lane with me.  It was a bit longer walk than I had anticipated when I sat down to write it, but sometimes the memories just come up and make us smile, and we just have to share, right?

Have a lovely Sunday & enjoy all the blessings our sweet Lord has given us!!!

Hugs & Blessings,
Teresa
=^..^=

Saturday, May 19, 2012

Stash Report & Rainbow Scrapiness!

I have been pretty busy the past few days getting ready to go on retreat at Red Rooster again – woohoo!!!  I’m really excited to go in the spring/summertime.  I’ve always gone in January or October, and it will be interesting to experience Alabama at this lovely time of year.  I’m also excited to see what kinds of eye candy Jennifer and Jim put up in May.  It is always as much fun looking at all their decorations as it is sewing & quilting!  Don’t worry, I’ll take lots of pictures :*) 


I finally managed to spend a little time sewing on my yellow scraps this month for the Rainbow Scrap Challenge over at SoScrappy.


I had a super fun time digging into my scrap bins to find just the right yellows and oranges to make this sweet sunflower for a small table topper for my Mom. 


I gave her the table frame for her birthday, and this quilt is her mother’s day gift.  Mom reads my blog, so she will see it here before I can get it to her.  So, Mom, I hope you like Sonshine =^..^=


I designed this quilt especially for my Mom, with the bright happy sunflower and the words “You are my Sonshine” quilted in at the bottom because they have a very special meaning to her.


When my mom was little, her life was not very stable, and she was alone a lot of the time.  Not a lot of hugs or love were handed out at her house.  But she had a favorite aunt who would pull her up into her lap in the old rocking chair and cuddle her every chance she got, and then she would sing softly to her, “You are my sunshine, my only sunshine….”  My mom remembers those times with her aunt as bright spots in her otherwise stark childhood.  Today, as a Christian, mom spells it Sonshine for her beloved Jesus, so I spelled it that way on her quilt too. 


For that little finish, I used about half a yard all told.  I did buy more fabric this week.  I really needed to add more aqua, gold and rose colors to my stash in order to begin putting Eldon together. 

Although I’m not entirely unhappy with my numbers, I’m glad that I don’t have a lot of things coming up that I need to buy fabric to complete.  (Good thing there are no more quilt shops between here and Red Rooster anymore! LOL)  Hopefully I now have almost enough to begin putting together Eldon.  I also have to purchase one final piece before I can start on my niece Raney’s quilt.  And I need to purchase the backing for Moonglow.  I’m planning to take care of that during an upcoming trip to Whittles in late June.  After that, I’m thinking I can work on UFO’s and scrap quilts for a while until I get my “Used” numbers a little closer to my “Added” numbers. =^..^=

So here are the final numbers for this week:

Used this week:      .50 yards
Used YTD 2012:      74.00 yards
Added this week:   4.00 yards
Added YTD 2012:   99.50 yards
Net Used for 2012: -25.50 yards

Head on over to PatchworkTimes to see how others are doing with their stashes.  And don’t forget to see what everyone has been working on for their Rainbow Scrap Challenge too!  I am always amazed at what we can accomplish with even the smallest scraps of color!!!


Hugs & Blessings!
Teresa
=^..^=

Also linking up with Such a Sew and Sew for May Stitches in Time:


Monday, May 14, 2012

Design Wall Monday – MOONGLOW!!!

Today my design wall is empty!  Why?  Well, because the quilt is finished!!!  Here is Moonglow in all her glory….


Isn’t she just absolutely gorgeous???  That Jenny Beyer knows her stuff for sure! This was my UFO Challenge quilt for April (& May) - it took two months to complete it, but I am so glad I decided to just continue it until I was done.  Whew!!!


It's a good thing I took this picture early Saturday morning, because it started to rain just after and we’ve not seen a dry sky since!  Laying it out on the patio was the only way to get the majority of the quilt in the picture.  At some point I will get some friends to hold it so I can get a picture of it square on. :*)

The borders were actually not as much trouble as I had feared, but they did take a ton of time!  There were seven of them (as I'm sure you remember from my previous whining!), each 1-3/4” wide, starting and ending with the black fabric.  The in-between colors radiate out to echo that “glow” look in the blocks.   


And by the way, my friend Denise at Count It *All* Joy helped me see my "whining" in a whole new light.... " that's not whining; it's running commentary on the whole creative process, good and bad.   It makes for explicit, dramatic, and thorough documentation.  LOL!!!"


Yes!!!  What she said!!!


So, ahem, uh .. to get back to the business at hand.... Each border was cut 3-1/2” longer than the one before it.  Then I sewed them together, staggering the edges in 1-3/4" on each edge.


I also reversed the direction as I sewed the strips together to keep them from curving from the feed dog action.  I learned that little trick while making the Twisted Bargello!  I pressed the seams all toward the inside on two of the borders and toward the outside on the other two, so that I could nest them when I did the mitering.  This helped a ton in getting those seams to meet perfectly!

When the borders were all sewn together as one unit, I marked a quarter inch in on the tips of the corners of the quilt, and began sewing the border units on each of the four sides, stopping and starting at the mark.


Then all that was left was mitering the border corners for a nice finished look!  It was so late when I finished this part that I forgot to take pictures, but here is the finished result.  


Whew!  What a huge job done and off my shoulders!!!  It will need to sit for a while now as I figure out what I want to do for backing fabrics and quilting designs.

Also, it is possible that I may end up adding another border to it!  My husband likes the quilt so much that he wants us to perhaps put it on our bed!!!  He says it is the only quilt I’ve made so far that can rival Bargello :*)  But in order to do that, it needs to be slightly larger as it is only 86” square.  Let’s see, let me think about that…. for a good long while!!!!  Well, at least a few weeks.  I really need to work on something else for a while in order to keep my sanity, if you know what I mean :*)

That’s it for me.  I don’t have anything else on my design wall yet, but next week I’ll start posting process pictures of Vintage Valentine!  


It’s going to be so much fun to do this sweet applique after all the intense piecing of Moonglow!

Have a marvelous week my friends!!!  I'm off now to have a little therapy time with my sewing buddies :*)  The first lady on the left is Linda, and we will be without her for the next 6 months because she goes to Wisconsin for the summers.  Take care Linda and we'll see you in October!!!


You can go HERE to Patchwork Times to see what others have on their design walls! 


Also linking up with What a Hoot for BOM's Away! 


Teresa
=^..^=

Saturday, May 12, 2012

Stash Report – Mother’s Day Week!

Happy Mother’s Day!!!  

I hope you all take the opportunity to honor someone special today who filled the need for a mother in your life.  Hopefully, that was your mom, but so often there are others who choose to step in and fill those shoes for us.  May God send extra blessings on all Moms, biological and otherwise, today!


My Mom and I have a 
special relationship – best friends!  


This is us together on the beach about 5 years ago.  (Don't you just love what the beach breeze does to my hair?  LOL!!!)


We used to go to Myrtle Beach every October, just the two of us, and we'd spend a week together just playing - just like two little girls.  What fun!!!  Mostly, we played with whatever crafty thing we were into at the time.  For me of course it always meant quilting.  Mom got into painting, and this is her the year she painted flower pots.


She lives in North Carolina and I live in Tennessee, so we don’t get to see each other as much as we’d like, but we are always on the phone together, touching base on what is going on in each other’s lives and praying together for everyone in our family :*)

I’m also a Mom myself to four beautiful children, two born to me and two who adopted me when I married their father.  And I love their spouses as if they were my own!

My daughter Christy and her boyfriend Ken.  They have a home in
Savannah Tennessee, but they actually live on their 18-wheeler
which they team-drive together!  Christy is mom to Emma (16) and Sara (14)
My son Josh and his wife Anna have been happily married now for
10 years and live in North Carolina with their two children,
Reaghan (8) and Adam (5)
Don's son Todd and his wife Nikki are newlyweds!!!  They live in
Raleigh North Carolina and have 3 dogs - 2 of them very large dogs!
Don's daughter Renee is mom to Hudson (6mos) whom you've met
on my blog before - he's such a sweetie!!!  Renee lives in
North Carolina too, just down the road from Josh & Anna.
If you counted from the above pictures, then you now know that I am also a Grandmother to 5 of the sweetest little cherubs God ever put on this earth!  You saw their picture recently HERE.  And we're hoping Nikki and Todd will be adding to that number sometime in the near future - *hint hint* hehehe!!!!

As for the more mundane details of life, my stash report is definitely more balanced this week!  I FINISHED MOONGLOW!!!  Well, it is a flimsy top at least :*)  It may be a while before it is quilted, because I want to give it time to tell me how it wants to be quilted.  I also have to decide what I want to use for the backing.  I could use plain black, but I’m not ruling out trying to find a nice dark Jenny Beyer that would complement the quilt more specifically.  But the main point for this post is that I get to claim 21 yards used for this quilt!!!  That’s what the yardage requirements state on the pattern, so that’s my story and I’m sticking to it!!!  =^..^=  Honestly I'm not surprised - this was a piecing intensive quilt!!!  Pictures will follow on the Design Wall Monday post.

As for additions, yes, I bought more fabric :*D  I needed more aquas for the Eldon quilt so I could begin work on it as soon as I have some other things out of the way.  I purchased 3 yards, mostly fat quarter batiks.

Oh and by the way - speaking of aquas, did you notice that I changed the color of my blog background?  I decided it was time for a change, and since aquas seem to be my favorite color right now, that's what I went with.  What do you think?

So here are my final stash numbers for this week:

Used this week:      21 yards
Used YTD 2012:      73.50 yards
Added this week:   3.0 yards
Added YTD 2012:   95.50 yards
Net Used for 2012: -22.00 yards

Still in the RED but it looks much better this week, wouldn’t you say?  *wink*

Head on over to PatchworkTimes to see how others are doing with their stashes.

Hugs & Blessings!
Teresa
=^..^=

Sunday, May 6, 2012

Design Wall Monday

Hopefully, this will be the last week I have Moonglow on my design wall because I am almost finished!!! 


Saturday night I finished up the FINAL BLOCK!!!  Look at all those points!!!

This block actually went together better than I thought it would.  


I allowed extra fabric for the curved outer sections and then trimmed off the excess as I squared it up after the block was assembled.


It worked out great doing it that way.  Much less painful than I had imagined – yay!!!  =^..^=


Yesterday I sewed all the rows together - it's almost a quilt!!!!  Then I cut all the strips for the SEVEN borders to complete it.  I decided to wait until today to start sewing them together and attaching them to the quilt center because I hate attaching borders and I don’t want to try to tackle them when I’m tired.  Smart, huh?

I'm sorry this is not a very good picture!  We took it just as the light was disappearing and a storm was coming up, so it is rather dull in this shot.  I’ll post a better picture of the completed quilt top just as soon as I finish it – promise!!!

Judy pulled #2 for the UFO Challenge for May, which is Vintage Valentine on my list.  Wow – another toughie! 


This is an appliqué hearts quilt.  I think I have four blocks done.  It’s going to be another beauty though, and the appliqué will be a nice change from the intense piecing in Moonglow!  I’ll start on it as soon as I can.  But first I have to begin working on my niece Raney’s quilt.  She graduates this year and goes off to college, and I want her to have a nice, soft lovable quilt from her Aunt Terrie when she goes! :*)

That’s it for my design wall this week – what’s on yours?  Go to Patchwork Times to see what others are working on!

Hugs & Blessings!
Teresa
=^..^=

Also linking up with: 
Can I Get a Whoop Whoop? at 
Confessions of a Fabric Addict


Related Posts Plugin for WordPress, Blogger...