Pages

Showing posts with label Easy Street. Show all posts

Tuesday, April 9, 2013

How NOT to Make a Binding!

Easy Street is finally quilted and bound  

I really wanted to have this quilt finished for Bonnie Hunter's visit last week, but time ran out for me to even think about trying to do it myself.  So I asked my friend Ruth to quilt it for me.  
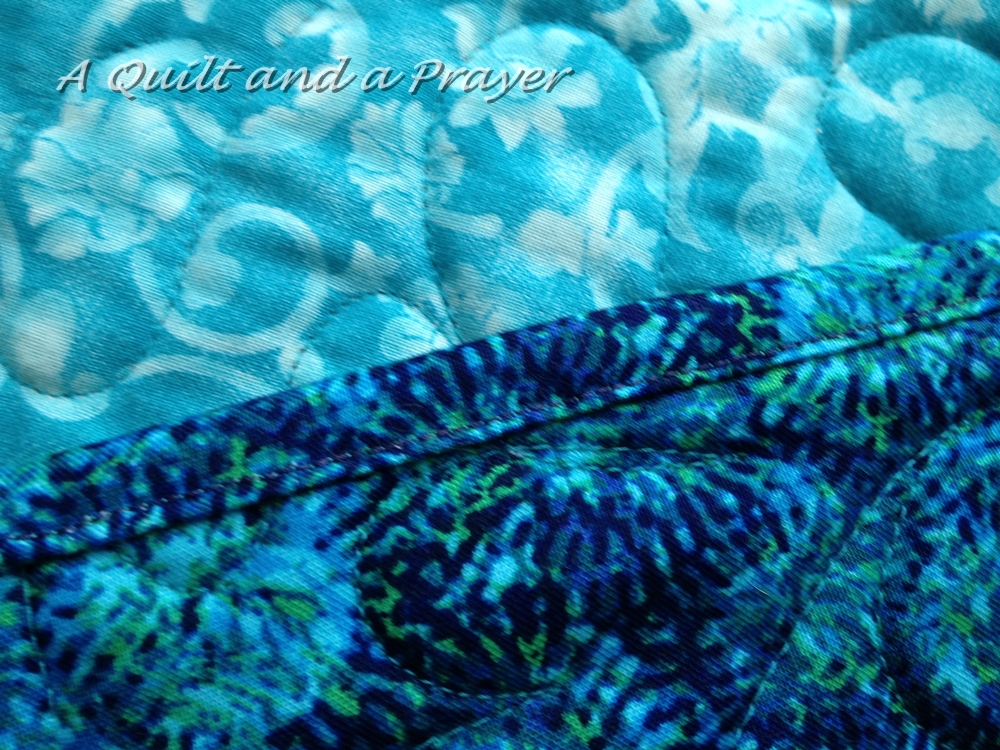
We chose this lovely feathery panto and Ruth used a gorgeous aqua thread... I just love it!!!!


I also chose to do the binding by machine - another time saver!  
Plus, the binding will be more secure and sturdy.  
Since this will be a guest room bed quilt, it will see lots of use and washings :*)

Sounds quick and simple, right?  
WRONG!

I had a really, really stupid moment while I was cutting the fabric for the outer border and binding.  The fabric was an older one in my stash and it worked perfectly with all the colors going on in the quilt - I especially love the little lime green specks in there!  But I had just enough - you know how that works, right?  I had a good chunk of yardage and then a nice-sized piece left over from an earlier project.  There was not an inch to spare - and no chance of finding anymore anywhere!

I carefully measured the quilt to figure out the number of strips I would need.  Nine was cutting it really, really close, especially with some of the strips from the leftover piece being shorter than WOF.
I calculated how wide I could make the border and still have enough left over for the binding strips.

And then I got stupid!
 I didn't recheck my measurements and I didn't write them down!!!  

You know the old saying....
Measure Twice, Cut Once?

Well, let me tell you, life is sure a lot easier if you listen to that saying!
And I'm adding in a for-the-future note just for me - WRITE IT DOWN!!!
=^..^=

I also didn't listen to my inner voice.  The one that said, "Cut your binding strips first, then measure what you have left and divide it by nine for your border strips."  Yeah, that voice.  I didn't listen.  And I went to work cutting my border strips first.  TOO WIDE!!!!  Instead of cutting them 4-1/2" inches like I was supposed to do, for some weird reason I cut them 6 inches!   Oh boy, was I in trouble!

It didn't take very long to realize that I wasn't going to have enough left for my nine binding strips at 2-1/4" wide each.  I had nothing else that would work for the binding, and I really wanted that beautiful border fabric to flow out all the way to the edge!

So this is what I did....

The remaining fabric was enough to cut nine strips at 1-1/4" wide.  Then I cut 1-1/2" off each of the border strips, leaving them the 4-1/2" they were supposed to be cut originally.  This left me with nine strips of each width, some of them a few inches shorter than others.  This is a huge quilt, and I was worried that with the strip joins and mitered corners, I might lose too much and run short.  I was holding my breath the whole way!


I then zig-zagged them together, with the edges butted up next to each other, like this....

I used a dark blue thread on the actual pieces - this is just to show how I did it :*D

I wasn't really sure if it was going to work.  After stitching the first two pieces, I tugged on them to see if they would be weak or separate - nope, it was a nice strong join!  Next, I trimmed the strips to a nice uniform 2-1/4" wide.

Since the strips were different widths, when I folded them in half the zig-zagged section was hidden in the fold.  And it laid nice and flat for me!


Don't you just love the satisfaction of a pile of binding all prepped and ready to sew down?


But was it going to be enough?  
That was the big question!!!

According to my measurements, I was going to have only inches to spare!


And voila!!!! 
This is what I had left over - 9 inches!!!


It was actually more left over than I thought there would be, so Happy Dance time!!!

So that is my story about my recent Adventures in Binding.  
It is a cautionary tale, and one I hope to take to heart in the future.

In the meantime, I will be enjoying my new quilt....


I wish you all...

Hugs & Blessings!
Teresa
=^..^=


Wednesday, February 13, 2013

Works in Progress - 2/13/2013

Since finishing up Easy Street, I've been working on catching up on some of my other projects, and whittling away at my Get It Done list for February.

But first I thought I'd share this SO CUTE little Heart Basket I made for Valentine's Day!


Isn't it just the sweetest little basket?  
I gave this to my husband filled with his favorite candies for Valentine's Day.  
No, I couldn't wait!!!  He got it early :*D

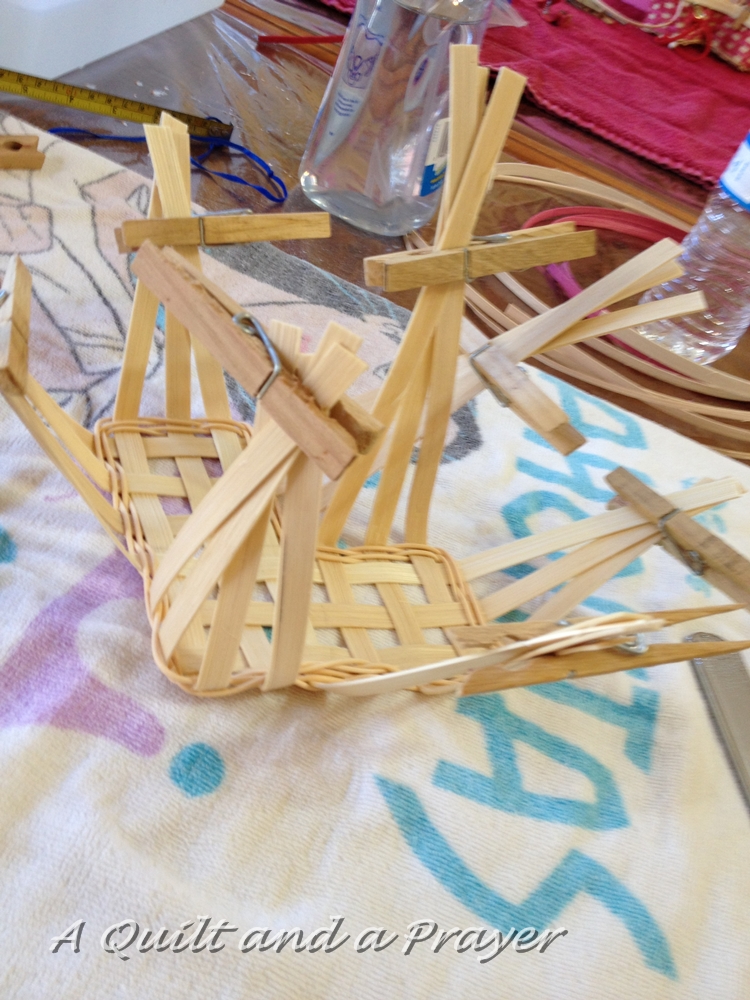
Here are a progression of pictures as I put it together.  It was a lot of fun!
(And yes, that is a Pocahontas beach towel under there LOL!!!)

The base is sometimes the hardest part, getting it square and the right size. 
It's especially hard when you have these odd angles!!!
Then getting the strips to stand up straight - I learned that this process is called "upsetting".
Yes, it was definitely upsetting to me at times LOL!!!

You have to clip the corners together until it is far enough along to begin keeping the correct shape.

It's beginning to look like a basket!!!  Don't you just love that deep pink reed?!?

The finishing touch!
This basket took me about 2-1/2 hours to make.  The other girls in the class finished up much more quickly than I did because they make baskets every month.  I also got there late :)  So they were halfway finished by the time I got there.  By the time I left, they had finished their basket, as well as a miniature one just like it!  Donna Christian teaches these classes, and she is such a great teacher!  If you're local to Nashville and would like to learn basket weaving, Donna's your girl!  Thanks again Donna!!!

Basket making is something I enjoy as a totally different hobby than quilting.  Sometimes I tend to get in too deep with quilting, too intense, too obsessed, so that I eat, sleep, breathe quilting!  I'm sure that never happens to any of you LOL!!!  It's nice to totally switch off the quilting button once in a while and take a breather.

Knitting/crocheting is another way I like to switch it up and relax with something different.  As I shared in my last post, I am working on this scarf which is a free pattern from Red Heart called Shore Thing.


And this is how far I've gotten on it.  


It took a little bit to get started because I couldn't get the instructions right to save me!  But it finally came together and it's coming along nicely now.  It's not an easy pattern though, so it won't be one of those I just pick up and work on without thinking about it.  I'm loving the colors, especially since they are not colors that I've worked with recently - another nice change!

As I expected, I was able to get quite a lot done on my next blocks for The Blue Collection at sit-n-sew on Monday!  This first block is completed except for leaving an opening at the mouth of the vase for flowers to come later after the blocks are assembled.


This was a really easy block to do because I basically let the fabric do the work of embellishment.  All the fabrics have lovely goldwork in them.

Then, I began working on the second vase, which will require quite a bit more work because it is assembled with lots of layers...


I noticed when posting this picture that the brown section seems woppy at the bottom, but I went back to check the pattern and it is that way too.  I may have to go back and smooth that out anyway.  We'll see.

And last, but certainly not least, I need to decide on a back for Easy Street.  I have this wonderful wide-back piece of aqua that I just love with it...


The problem however, as you can see here, is that it is not long enough....  


I must have bought the end of a bolt in a sale when I got this, because I always buy at least 3 yards of a wide-back - this is only a little over 2 yards.  I thought about keeping it for a lap-size quilt, and I may still do that.  But if I decide to use it, I either need to find a similar or complementary piece to make up the difference or make more Easy Street blocks to carry the design over to the back.  Ugh!!!  Not sure I could handle making more ES blocks right now!  Having this quilt and the backing ready for quilting is one of my February Get It Done items, so I want to get it done quickly and not just put it on a shelf until later.

So that's what I'm up to this week - busy, busy, busy!!!

And what does Gypsy think of all my hard work?  
Something tells me she is NOT impressed LOL!!!


I'll be linking up here with these fun blogs - come join in the fun!!!

WIP Wednesday at Freshly Pieced


************************

Hugs & Blessings!
Teresa
=^..^=

Monday, February 11, 2013

Design Wall Monday - 2/11/2013

I bet you can guess what's NOT on my design wall....


Easy Street!!!
It's finally pieced and ready for quilting!
WhooHoo!!!!


The sun actually showed it's bashful face for a little while this morning, so I quickly grabbed 
the quilt, my camera and my husband, and ran outside to get some pictures!  
Have I said how much I love this quilt?

I love the border fabric - it has just a tiny speckle of the lime green in a sea of deep aqua blues and purples - YUM!!!  The inner border is a deep purple.


Lots of really fun fabrics in this baby!!!

Laid out on my sewing studio floor :*D

It always feels so good to finish one, doesn't it?  
Especially one you love as much as I love this one :*)

So, what IS on my design wall?  Nothing!  I pulled it down and stored it away when Easy Street came off.  However, I do have a few projects in the works.  
(You didn't think I was DONE did you???  Heaven forbid!!!  LOL!!!)

I spent the morning preparing my next two blocks for The Blue Collection, and then a few hours this evening stitching on the first one while I watched a little of the Grammys.

I had a little trouble with this piece - see the narrow space between the curl and the base?
There's very little room for turn-under there!


I finally got it worked out, but it was worse than shaving a flea!


Not my finest applique hour, but it'll do!


And all's well that ends well, I say - well, in applique anyway ;*D

I'll work on these tomorrow during sit-n-sew with friends.  
I should be able to finish up the first side vase and at least start the second one.

I also picked up a couple balls of yarn on sale last week ....


Aren't these pretty?!?  I love the bright, spring-is-just-over-the-horizon colors!!!
I will be making this cute scarf - it's a free pattern from Red Heart yarn.


Shore Thing Scarf by Red Heart

Now, if I could just manage to crochet a scarf that will make me look as thin & gorgeous 
as this gal, THAT will be an accomplishment!

Be sure to go over to Judy's Patchwork Times to see all the lovely things on her 
Design Wall Monday linky party!

And if you haven't already checked it out - go HERE for my amazing GIVEAWAY!!!


Hugs & Blessings!
Teresa
=^..^=

Sunday, February 10, 2013

Stash and Stitch Report - Feb 10, 2013

Not a lot of stashing or slow stitching have been going on around here lately, because I've been focused on getting a couple of projects to the completed flimsy stage, ready for quilting.  


However, I did pick up these two wonderful pieces from Jackie at Canton Village Quilt Works.  I've been trying to be good and not buy any fabric these past couple of weeks, but when I saw these, let's just say there was no way I could pass up such fun fabrics!!!  I just had to have a little of each ;*D

Here in classic Black & White....


And here in COLORS!!!!


Aren't they the cutest?  You can have them too - go see Jackie and she'll take wonderful care of you!  Her customer service is top-notch and fast.  You wouldn't believe how quickly these shipped :*D

I really didn't feel too bad about stashing these .... BECAUSE.... I have a FINISH!!!!  Easy Street is a flimsy!!!  And all the fabrics for that quilt except for a few black-on-whites came strictly out of my stash!  Whoohoo!!!!  The quilt finished up at 97x97 - it's a large quilt and used up a lot of my aquas and lime greens, not to mention pretty much wiped out my black-on-whites.  I used up one entire 2-yard piece for the outer border and binding.  If I were counting yardage, I would say it took at least 10 yards of stash to complete this monster :*)  I'll try to post pictures on my Design Wall Monday post if I can get any decent ones.  We are supposed to have more rain all day today, so we'll have to see how it goes.  Here's a sneak peek for now ....


You can see how others are managing their stash over at Judy's Patchwork Times!

I finally got the backgrounds pieced for my next two blocks in The Blue Collection applique.


These are the two long-tall vases that sit on each side of the quilt and have leaves flowing up out of them to the top of the quilt.  I have all the inside blocks done except for the center vase that holds the braided tree.  Getting these vases done will mean I am really getting close on this project!  I hope to finish prepping the applique pieces this morning so I can stitch on them for a while in the afternoon.  I love linking up with Kathy over at Slow Sunday Stitching!

And DON'T FORGET to check out my super GIVEAWAY .....

Hope everyone has a happy and relaxed Sunday!!!

Hugs & Blessings!
Teresa
=^..^=

Monday, February 4, 2013

The Wall Is Coming Down!

I'm in the final stages of assembling several projects right now, 
so my design wall is looking more and more bare =^..^=

I sewed together the Rainbow Pineapple blocks yesterday, so they came down first. 

These were my Rainbow Scrap Challenge blocks last year.  I'm still working on the 
paper-pieced flying geese border for this small wall quilt, so it's not quite done yet. 
Right now it is about 20 inches, and so darn cute!


Then I started assembling the Easy Street blocks into rows.....


I'm about halfway done with assembling this top, as you can see by what is left ...


My design wall is made of two freestanding 4x8 pieces of insulation covered in batting, 
so it's HUGE!   I left my ladder there to show you that I have to use it to reach the top blocks :*) 
(Please pay no attention to the dried paint splatters on the ladder LOL!!!) 
My little room heater is there too - those Ivory Towers can be rather drafty, don't you know!  
Ask any princess and she'll tell you.  Why do you think they grow all that hair anyway?  
To keep warm of course!!!

Because my sewing studio has those slanted ceilings common to a lot of upstairs bonus rooms, my design wall boards have to lean up against the slope in front of my project table.   Of course, this can get a little awkward when I need to get to my project boxes under the table.  So when it is not being used, I take the boards down and put them in another room out of the way.  Easy Street has been up here for quite a while, so I'm looking forward to having all that space back in my studio!

During the Super Bowl, I had planned to work on my next Blue Collection block.  


However, I didn't  realize that I had not yet prepared the scrappy yellow background 
until the game was ready to start.  Dang!  Tricked again!!!

So I picked up my knitting and worked on the other hand warmer for my right hand...


This pottery bowl was hand made by a friend, Jim Murff.  He's a local artisan who does all kinds of wonderful artworks, including pottery, quilting and beekeeping.

I managed to get all the knitting done for the hand warmer, so all I have left to do is sew up the side, 
leaving the hole open for my thumb.  


I'm no expert knitter as you can tell from my uneven stitches LOL!!!  
But I will enjoy wearing these and knowing that I made them!
Perhaps someday I'll even tackle making a pair of socks :*O

Please be sure to go to Patchwork Times to see what others have on their Design Walls!


Hugs & Blessings!
Teresa
=^..^=
Related Posts Plugin for WordPress, Blogger...