Pages

Sunday, June 26, 2016

June UFO Busting

My Guild UFO Challenge for June is to quilt my Blooming Nine Patch (B9P).


Looking back through my posts about this quilt (you can also see them if you click on the quilt name above), I recalled that I began work on it during a class taught by a good friend and guild member, Pam Thorne, in late July 2014 ....

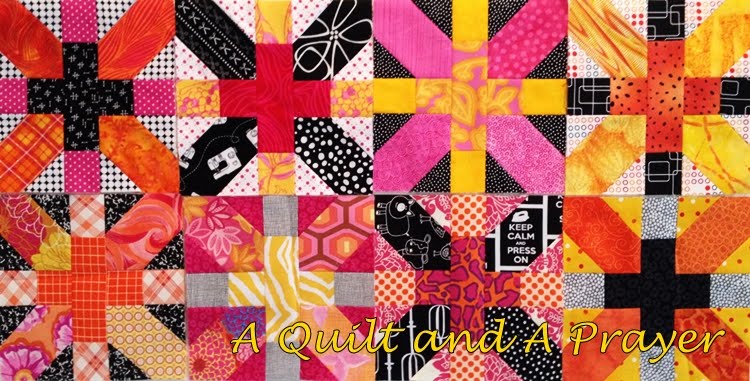
Fabrics in the quilt with the exception of the second one from the left
Although you might think "batiks" when you see this quilt, only 3 fabrics are batik

Getting a good start!

I finished piecing the top in late October of that same year.  Two years since I started it - yep, it's time to get this puppy quilted and done!

My first thought was to simply do a nice flowing panto on it .... something that could be done in a day on the longarm.  The busy pattern would probably not show the quilting stitches very well, so no need to get fancy with it, right?  Buuuuut .... this diva quilt top kept asking for free-motion feathers!  Seriously?  Yikes!  The longer I thought about it though, the more excited I got about doing some lovely free-motion on this favorite quilt top.  It had been ages since I had done any serious free-motion quilting even though it is something I really enjoy.

I knew there would need to be quite a bit of practice on muslin sandwiches first of course!


It was actually 2008 when I had last quilted free-motion feathers on a large quilt, but I remembered that it was great fun, very rewarding, and I loved the way the quilting turned out.  I wasn't sure how long it would take for me to begin producing decent looking feathers on the sample swatches, but happily in only a few hours they were coming along nicely.... not perfect, mind you, but I knew better than to hope for that!


After practicing throughout the afternoon, I was comfortable that I could do a decent job on the quilting.  Next, I had to baste the quilt sandwich - Ugh!!!  One of the main reasons I have been grateful for friend Joanne's generosity with her longarm is not having to baste sandwiches!  I simply can't get down on the floor to do this anymore, but there was no getting around the fact that it had to be hand basted.  I had seen many other bloggers post about how they used this table-basting method and that it had worked well for them.


I like to use a combination of basting glue spray along with safety pins - the basting spray really adds that extra control to hold the layers together securely no matter how much I shove and shift them under the smaller harp of a domestic machine.  So I asked My Guy to set the table up in the garage, because after all the health struggles I've faced recently because of chemicals and toxins in my environment, the last thing I wanted to do was spray a bunch of chemicals into the air in my home!


I was pretty optimistic that it would work out well once I figured out what I was supposed to be doing - Happily, it worked like a charm!


Because I use the basting spray, there's not a need for a lot of pins, just enough here and there to keep it in place enough so there's no opportunity for the layers to pull loose from the glue basting ...


Once a section was pinned, then it was a pretty simple matter to move on to the next and clamp it in place...


I have to say I'm delighted to know there is an easier way to baste large quilts, and I won't let that keep me from getting as creative as I like with the quilting stage of my projects in the future!

When I finished basting and laid the quilt aside while setting up my machine, Mr. King of the Studio decided a little Quality Assurance testing needed to be done to test it for nap-worthiness before things could go any further.  Does this face look like he's willing to compromise on this all-important stage of the work to you? ....  Oh my gosh, he's a tough Snoopervisor!  All the workers in the studio are terrified of him and toe the line!


Even after he grumpily graciously allowed me to have the quilt back, he continued to insist on curling up and napping on it - even while I was stitching!


I finally had to put a quilt next to it on the work table for him to nap near me (or near his quilt, depending on who is telling the story LOL!)


Once I got everything (and everyone!) settled, I nervously began to stitch some feathers.

My Janome 6600 is a trusted friend!  She has been my quilting workhorse for the past 10 years, and I've pieced and quilted so many quilts on this beloved machine with nary a hiccup.  So I was quite shocked when I hit a road block almost immediately.  I had all of one feather section quilted before I started noticing that the top thread was no longer sinking into the layers and the bobbin thread was popping up on the top .... uh-oh!


You can see from the threads at the top right that it was not doing this at first, so I didn't realize there was a serious tension issue for a while.  But when I checked to see what was happening on the back, I got a very ugly surprise ....


Apparently the tension issues just didn't show up on the front at first, but it was looking pretty darn nasty on the back from the beginning!  I can't remember EVER having tension issues with this machine.  I even have a separate bobbin case with the tension set for free-motion that has never failed me.  All had gone well during the practice sampling, so I can only assume the problem lay in using a thicker top thread (King Tut #40) with a thinner bobbin thread (SoFine) for the actual quilting on the quilt.


All production stopped - with a few choice words coloring the air of the studio I must in all fairness add! - while I fiddled and fidgeted with the tension both upper and lower until it was in such a mess that I couldn't even get it back to stitching normal stitches anymore!  This happened on a Saturday afternoon so I was looking at having to take the machine in to my local shop on Monday and waiting until I could get it back.  Thankfully, My Guy sat down with me on Sunday morning and spent a couple of hours very painstakingly going through the tension settings until we had it making decent stitches again.  Seriously, he's my hero!!!


I can't say it's working perfectly - I may need to replace a bobbin case - but it's working well enough that I've been able to continue quilting the B9P.  I'm hoping it gets me through this project so I can make the July 6 deadline!

Following are a few progress photos - you can tell I get a little more comfortable and the stitching is smoother as I go along ....


Discounting the frustration of tension issues, this project has been a real joy for me!  I have to carve out time to work on it because lots of other good things are going on as well, such as these two coming for their summer visit!

Granddaughter Sara and Link on the way to our house
They look just as excited as we are about them coming!

Sara is now 18 - all grown up!  


But she's still young enough to be a delight to have around and to teach new things :*)  Do you remember her from this picture when she was learning to sew on a previous visit?


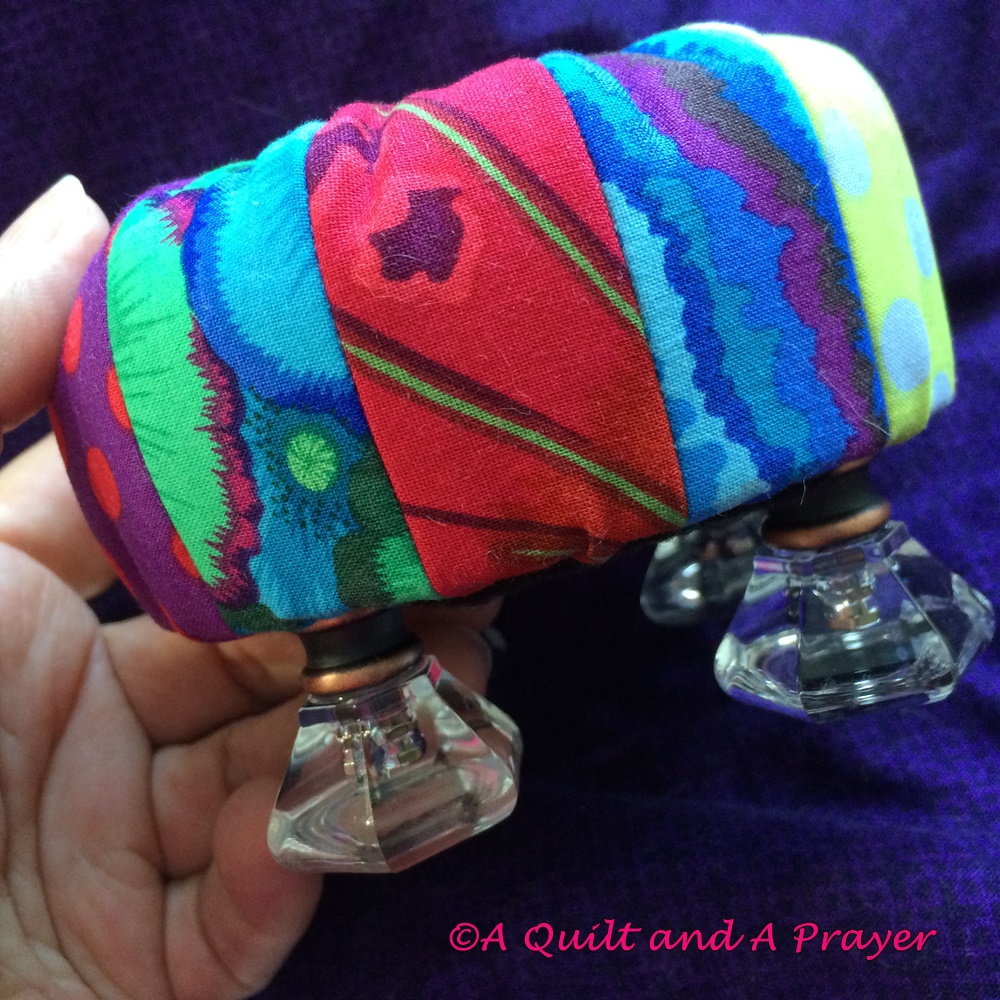
She had just finished her first ever sewing project - a pillowcase out of soft beach fabrics.  We are planning to be up to lots of different crafty things while she is here.  Like stitching up one of these .....


Needless to say, Rocky is not quite so delighted with their visit - he has taken to hiding under the bed and being very inhospitable!  Anyone would think sweet little Link was a huge devouring beast intent on tearing him from limb to limb!  It is clear we have some manners training in our future. But he did find a chance to sneak in and take a nap on the B9P for a few hours, so although he might try to tell you otherwise, all is not quite misery is his world. =^..^=


Hugs & Blessings!
Teresa
=^..^=

Linking up with the following fun parties:
Design Wall Monday
Can I Get a Whoop Whoop?
Let's Bee Social
Tuesday Linky Party

Sunday, June 19, 2016

Fluttering and Sparkling .....

This has already been a very busy summer - is it even officially summer yet?  Well, it feels like summer with the 90-degree days we've been having here in Nashville! 

Time for blogging has been hard to carve out, but I've got lots going on to share with you.  A couple of finishes, several projects in the works, and a few that are still in the design stage.  For instance....

This cuter-than-stinkin'-cute Tuffet Pincushion just happened to get made and now sparkles up the studio quite nicely .....


One day soon I hope to make one of those wonderful full-size Tuffets that I've been seeing in blogland, but in the meantime I bought a kit at Mountain Quiltfest to make this adorable little pincushion, and I couldn't be more smitten!  It was surprisingly easy and fun to make as well :*)

I started with lots of bright and happy scraps from my Kaffe and Philip Jacobs stash ....


Then I added a little bling ....


These are drawer pulls from the local hardware store.  You can get much more inexpensive ones of course, but I just fell in love with these sparklers and couldn't resist.  As everyone knows, I'm pretty much a lot like a magpie - a real sucker for anything bright and shiny LOL!


After a bit of a battle between my desire and my budget, I decided to splurge since the pincushion will be something I see and enjoy every day.


Of course, I have to keep it in a drawer except when I'm actually sewing because of this little guy....

Rocky helping me practice my free-motion feathers -
"Mom, make your curves nice and smooth, like my perfect little kitty toes ... "
=^..^=

He's pretty much declared himself King of the Studio, and if I'm sewing, then he's right there snoopervising, up close and very personal ....


.... dangerously up close!  And if there is even one pin in sight, he'll zero in on it and have it in his mouth before I can stop him.  I've taken to using one of those magnetic wands on the floor before I leave the room so he doesn't find a stray one.  Sheesh!!!

As for the "Fluttering" I mentioned earlier, here is my latest new start ....

In-Flight Monarch Butterfly
design by Debra Gabel @ Zebra Designs

I posted HERE in September 2012 that I had purchased these patterns and hoped to begin work on them.  2012!!!!  Sheesh again!!!

My friend Pat and I have been talking about getting together and playing with these blocks for well over a year, and every time we plan a playdate something comes along to spoil our fun.  She's already fused down 5 of her blocks waiting on me to get started!  This past week, we finally put a date on the calendar and refused to let anything stop us.  We had a lovely day!!!!


I used Lara Buccella's (BuzzinBumble) applique technique from her new book, Crafted Applique, and I just love the results.  No fraying edges, and I can tell that they won't fray even after I stitch them down.  Nice!  This is the perfect project for this technique, because there are lots of little fiddly pieces ...

Some of these stems are smaller than 1/8" wide!

The edges look a little rough, but that is because I used serrated scissors to cut the pieces and they grabbed the edges a bit.  With my next block, I'll use a sharp pair of sheers.  I'm really excited to finally get my first block done, and can't wait to start the next one.

One more project is not even really started yet ...


I've pulled these fabrics to make another See-n-Go project bag.  I was inspired by this amazing Kaffe Fassett print called Corsage ...


I'm going to be teaching some friends how to make this bag in a few weeks, so I wanted to make a new one to refresh my memory on all the little details.  Not to mention that I can't have enough of them LOL!!!  (If you would like to make a See-N-Go Project bag of your own, you can go HERE to find out how to get the free pattern!)

Finally, I have two finishes to share ....


My mini Fractured Seahorse has been labeled, bound and hung on its standing frame, and now graces our living room so we can enjoy it every day!  I chose this deliciously curvy hot pink that somehow reminded me of the Little Mermaid :*)


I like to sew the label into the binding so I only have to hand-sew 2 sides - and it's more secure!

And Calypso also got its binding sewn down.  I chose to do a small flange of the red in the fold of the binding to give a little pop of color between the border and the binding.....(it's not crooked, that's just the way it is draped over the chair arm).


This one also resides in our living room now as well - doesn't it look wonderful with our claret-colored furniture?


Finally, I thought you might like a quick peek at my current Design Wall ....


It's a hodge-podge of lots of little projects in the works.  Unfortunately, pictures on this wall are never great - the lighting is bad in that area of the studio, but you get the idea.
-  Top left - blocks for Cool Diehl, a set of blocks I'm putting together from a Kim Diehl design.  I'm using Kim's fabrics too and loving the way it is coming together!
-  Top right - a block gifted to me by my friend Carol Ann, waiting for it to tell me what it wants to be
-  Middle left - In-Flight Monarch Butterfly
-  Middle right - Whoooooo's Your Daddy?
-  Bottom left - a partial of my Diamonds are Forever
-  Bottom right - two See-N-Go Project bags in the planning stage

I spent last weekend sandwiching a couple of large quilt tops to be free-motion quilted on my domestic machine.  I started quilting one of them this week, but since I don't want this post to drag on too long, I'll come back and share some pretty pictures in a few days.

Happy Father's Day!!!!
♥♥♥♥♥♥♥♥♥♥♥♥♥♥♥♥

Hugs & Blessings!
Teresa
=^..^=

Linking up with the following fun parties:
Design Wall Monday
Oh Scrap!
Let's Bee Social
Tuesday Linky Party
Scraptastic Tuesday

Tuesday, June 7, 2016

Head's Up - Flash Sale!!!

Just dropping in quickly to let you all know that Juliet at Tartankiwi is having an amazing Flash Sale right now!

Photo courtesy of Tartankiwi.com
                       

From now until June 10 all patterns in her Etsy and Payhip stores are 30% off!!!  This is a GREAT opportunity to snap up a couple of her patterns that have been calling out to you, right?  I zipped right over and snapped up the stunning Fractured Zebra face and Panda Bear patterns (just love me some panda bears, don'cha know!)

Go HERE  for Etsy, and HERE for Payhip 
And tell her I sent ya!!!

Hugs &Blessings!
Teresa
=^..^=
Related Posts Plugin for WordPress, Blogger...